
This is a wall decal installation instructional. To achieve best results, you will need a level, a cloth, squeegee or credit card, and a hair dryer for more advanced installations.
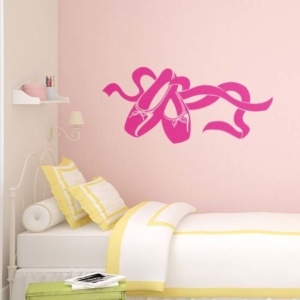
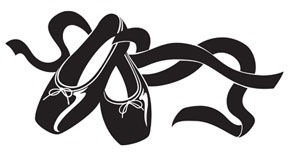
Ballet shoes with ribbon bedroom wall decor
Step 1: Prepare Your Surface For Decal Installation
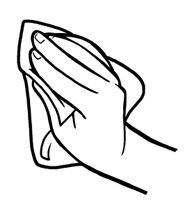
Use a damp cloth to clean your wall. Let the wall dry completely before proceeding. This step is important because walls have dust particles and residue that could affect the adhesion of the wall decal.
You will need to allow a freshly painted wall to cure 2-3 weeks before installing your decal.
Unroll your Sioux City Vinyl & Embroidery Wall Art decal and lay it flat on a hard surface. Use the squeegee to flatten any rolls or wrinkles. Flip it over and repeat the process. If your decal curls up, you can weigh it down with books.
Step 2: Position the Decal on the Wall
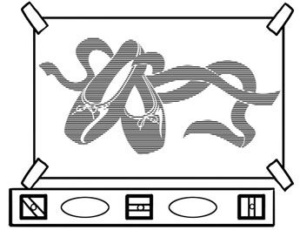
Use painter’s tape or masking tape to position the decal on the wall. This allows you to preview the arrangement and it’s location on your wall. We also suggest using a level to make sure the decal is straight. If you do not have a level but do have a smart phone, there are several free smart phone apps that will turn your phone into a level.
After you have achieved your desired placement of the decals, place a long strip of tape across the middle of the shortest distance of the decal(s). Then remove any additional tape that was used for previewing the arrangement.
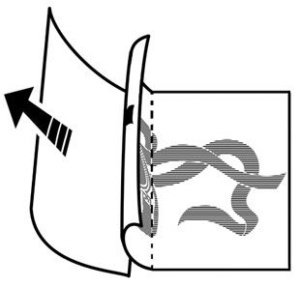
Step 3: Transfer the Decal to the Wall
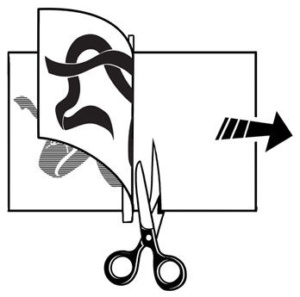
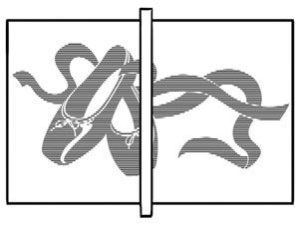
With the decal taped to the wall, slowly peel the backing paper away from one side. The vinyl should stick to the transfer paper on top. Peel until you reach the center and then cut away the base paper. (It helps to have a friend to help with the cutting but it is not necessary.) If a section of the decal remains on the transfer paper, carefully lay the transfer paper back over the stubborn vinyl, push tape down with your fingers, and try to peel it back again. Just take your time.
Step 4: Smooth the Decal
Using the squeegee or a credit card, start from the center and use a smooth and firm motion to burnish the decal onto the wall. Slowly work your way from the center to the outer edge of the decal. Remove the long piece of tape and repeat the process on the other side. Remember to work from the center outward to avoid air bubbles.
Note: If your walls have a texture on them, your decal may adhere better if you wrap your squeegee in a soft cloth. The cloth will help press the decal into the nooks and crannies of the wall texture.
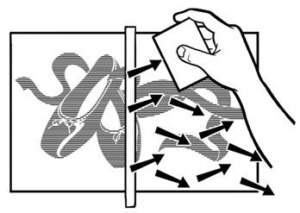
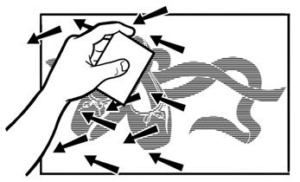
Step 5: Remove the Transfer Paper
The decal is now on the wall, but the transfer paper is covering it. Begin at one of the top corners and SLOWLY peel/roll the paper down onto itself and away from the decal. Think like a cat/kitten and paw the transfer tape down the wall to remove safely.
Be careful not to peel the paper away at a 45-90 degree angle as this will pull the decal away from the wall. If any part of the decal begins to come off the wall, stop and rub the transfer paper back down on that section with your squeegee or fingers until that portion of the decal adheres.
Note: If the transfer paper won’t release the decal onto your wall, take a damp sponge onto the back of the paper to moisten it and help release the adhesive.
Step 6: Special Considerations
The Weather: In extreme weather conditions vinyl might not apply as well on exterior walls or in places like a garage or tool shed. Vinyl applies best in temperatures between 60-80 degrees. If the surface is too cold, vinyl will not stick well, and the cold temperature could cause vinyl to tear. Usually in a home this is not an issue. But, if your wall feels cold when you touch it, you may want to warm up the room first.
Wall Texture: Cozy wall decals are designed to stick to any non-porous paint (they stick best to semi-gloss but they also stick to matte and high-gloss paint). They stick best to smooth surfaces. They may not stick well to highly textured surfaces. Try your test decal first to make sure it will stick to your wall. To achieve the best adhesion possible on a textured surface, after you remove the transfer tape, use your fingers or a soft cloth to very gently run the decal into the grooves of your texture.
** For more complicated textures or decals, use a hair dryer on (very) low to soften the adhesive while pushing it into the grooves.